Anyone who has tried to create a new product knows that a prototype is always required. This is for proof of principle, marketing and of course patenting. With the advent of 3D printing, this step has been greatly simplified. One of our customers, Dan Durand of ETATech 3D, uses our neodymium rare earth magnets to help him in this. Below, he describes in his own words & images how he built a jig for the photography phase of some of his projects.
Positioning Target Magnets
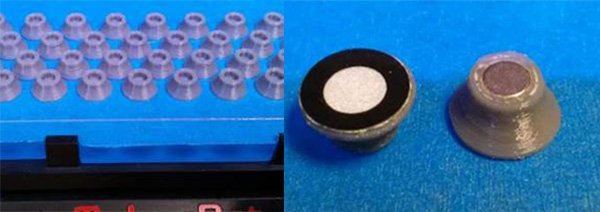
Positioning targets enable a hand-held 3D scanner to determine its orientation in 3D space with respect to the object being scanned. They are self-adhesive and normally stuck directly on the surface of the object being scanned. The process of applying and later removing these targets can be time consuming if the object’s surface is not adhesive–friendly and wasteful as the target cannot normally be re-used.
Using the magnetic tees. I can quickly “stick” positioning targets on the surface of any ferrous object and remove them just as easily. As well, I do not worry about targets lifting off of the object’s surface (if the adhesive lets go) or the target tees moving on the object (if the object gets bumped) as these are very powerful magnets for their size. These little magnets save me both time and money.

These look like cut-off golf tees and have a reflective positioning target on the wide end and a 5mm x 2.5mm neodymium disc magnet in the narrow end.
3D Printer Scanning Frame
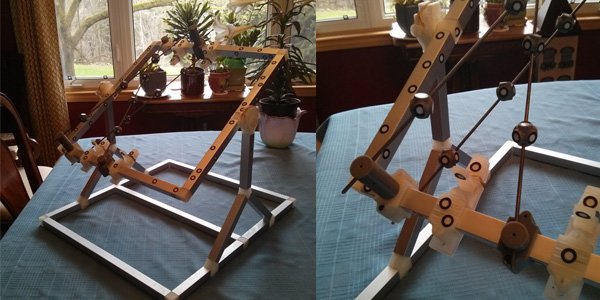
The next images are of my 3D scanning frame that I use to hold small/flimsy objects securely so that all surfaces can be scanned in the exact same orientation.
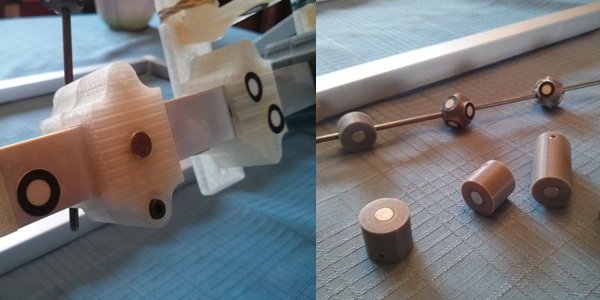
This saves both time and material costs. The target rods have magnetic pucks at each end and can be positioned further away from the scanning frame using magnetic stand-off blocks. These blocks and pucks use the 7.5mm x 5mm and 7.5mm x 2.5mm neodymium disc magnets to hold the apparatus secure yet allow for quick removal when the object to be scanned is being installed/removed.

The frame was made from 1” square aluminum tubing with 3D printed corner elbow, “T”, “Y” and pivot/yoke fittings.

The magnetic blocks are used to hold “target rods” above the object being scanned, eliminating the need to stick adhesive targets on the object itself.

These fittings are all press-fit so that the frame can be re-configured if needed. Around the perimeter of the rotatable frame, are a series of moveable/adjustable clamps and magnetic blocks.
Conclusion
To be written


